Friday, May 30, 2014

Breakfast Burritos

For this week's favorite recipe - I'm going to share with you what I did over the Memorial Day Holiday!   Having Monday off from work offered some time at home, and  I recreated my Breakfast Burritos!


 This allows me time in the morning, especially if I bring the burrito with me to work! These take some prep-time, but they are an easy go-to breakfast.   The original idea came from Pinterest (of course!) although I can't find the original pin right now.  I will link to it later if I come across it again!  This one is similar


I've made these burritos before using sausage, and bacon, this time decided to try using thick cut pepper bacon!  I like this version better, but it really is a personal preference.

I use smaller 8" tortillas that you can buy at the local supermarket or Wal-Mart for about $5 per 48 shells.  These shells are not whole wheat like the ones that we use for tacos in our home, but they work well for reheating as they are just a little thicker.  I have found that freezing tortillas works best with flour based ones, but feel free to do what works best for your family.


Since I had some spare time on Memorial Day that I did not have to work (thank you Holidays!), I cooked all of these in the morning while H was at the gym and I had the house to myself.   I personally prefer to cook all of the ingredients first and place them in mixing bowls on the counter before assembling them.   I tend to do 2 or 3 different "sets" as I go, so that I can cook the bacon and hash-browns a little slower.
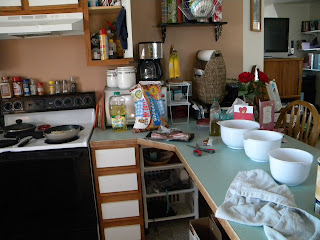
my messy (in process) kitchen!
Here is what you will need for approximately 30 burritos:
  • tortilla shells 
  • 1 large package of hash-browns
  • a dozen eggs 
  • 2 lb package of bacon (I prefer thick-cut pepper)
  • *cheese*  (I forgot this step, so I've been adding it in as I microwave them)
Step 1:  Cook hash-browns, eggs, & bacon 

Step 2:  As you finish small batches of each type of breakfast food, place them in mixing bowls
(I used layers of paper towel to drain excess oil/water from the foods in between my small batches) 

Step 3:  Lay out Saran-wrap (plastic wrap) on the counter, then place a tortilla on top
 (don't do this until you are ready to wrap them, or the tortillas get dried out and don't close as nicely)

Step 4:  Add a small amount of each ingredient to the shells - (and DON'T forget the cheese like I did)

Step 5: Wrap & repeat

After everything was wrapped, I put the burritos into freezer bags and placed them in the freezer.  

When you are ready to eat them, I suggest taking them out of the plastic wrap and wrapping them in a paper towel, putting them in the microwave for approximately 1 minute on each side.  Since the ingredients are already completely cooked, you just have to heat them until warmed through.   Because I forgot to add in cheese (oops) I have to put the cheese in each time I microwave them... DARN! 

Everything in Place Please

Thursday, May 22, 2014

Time Management - Part III - Microsoft Outlook (Calendar)

*note* this post is not being compensated in any way - I just use this tool &LOVE it! 

For Part III of the Time Management Series,  I am going to give you a Thursday - Tech Tip involving a program that you might already have installed on your computer! 

Microsoft Outlook is a program that comes in the Microsoft Office Suite.   It is the calendar I use to manage my many work responsibilities and deadlines at my J.O.B. - Here, I'd like to show you some of the simple tools available within outlook to make your life easier! 

Overall, Outlook saves me a lot of time at work because it is my "digital brain".  The reminders that I can set on the calendar save a lot of headaches.  As many of you know, I have a very complicated concert schedule that I run as a part of my job.  This requires several deadlines for the same event: press releases, posters, programs, piano tunings, etc.   All of these can be digitally worked into my calendar; and when that deadline approaches Outlook pops up a reminder to do those things!  (The reminders are also in your task list if you don't want to wait for the reminder)

The archive feature also allows me to store several years of past e-mails (only the important ones, don't be a digital hoarder) - which saves countless hours of recreating things that have already been done!  


The reply buttons are right at the top of the homescreen - as is the shortcut menu - both of which are used constantly.    (I personally love clicking "To Manager" and having an e-mail pop up without wasting a key-stroke!)

Also, when a new e-mail comes into my in-box - I instantly sort it according to if it needs follow up.  Clicking the flag next to an email creates a "follow-up" in the system; and adds the e-mail to your task list.   If you right click when creating this flag, it also gives you the option to create a reminder with an alarm!   If it doesn't need follow up right away, then I will assign it a color as a "category marker"  - this allows me to look at my in-box with one sweep; and see what categories are waiting for me! 


  Everything In Place Please

Saturday, May 3, 2014

Time Management - Part II - Planning System Makeover

Before we get started with my totally awesome new planner - let me show you a little bit about the "old" system.   This planner from Organizher is really, really fabulous - totally customizable and durable.  I fell in love with this planner and have been using it for 2 or 3 years now.
Planner inside view
My "OLD" planner with categories

After knowing that this planner has worked for me for 3 years, and seeing how much I LOVED this planner, you are probably wondering why I have changed my tune ... well,  I started Graduate School!

I am really excited about my future and am thrilled that I will be able to complete my Master's degree from my home university while continuing to work full-time.  I really enjoy the online course format, but one thing that is missing when you "go to class" online is the consistent reminder of what assignments and readings are due on a given day.  For this reason, I decided to make my own planner for the 2013-2014 Academic Year.

I needed more space for each day than my previous system allowed for; so I elected to make the planner on 8.5 x 11" paper.   See a picture of the planner below:

The new layout - 8.5 x 11"
Here is an explanation of each page:
(I intentionally picked a week without much going on, so it wouldn't be messy!)


The binder I chose to use is the Wilson Jones Cut and Sewn Binder - find it here.  I really like the durability and feel of this binder, plus it has an elastic strap that can hold it closed --  (and it has 3 rings!)


Let me know what you think about the new planner system!   I can't wait to share how it is working for me! 

Everything in Place Please!