Saturday, July 19, 2014

Car Emergency Kit (Survival Series Part III)

In this Survival Series post, I will walk you through the items in my Car Emergency Kit.
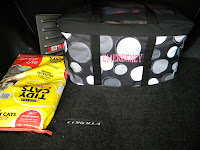
My Emergency Kit in the trunk of my car!

I have always had an emergency kit in my car, thanks in large part to over-protective parents!  The basics that everyone needs to have in their emergency kit are:
  • small first aid kit 
  • food 
  • candle and/or flashlight (test the batteries)
  • jumper cables
  • basic hygiene items (tampons, baby wipes and/or toilet paper)
  • kitty litter 
  • shovel 
  • water
  • change of clothes
  • a blanket 
I know there are several more items in most emergency kits, but these are the basics.  I will walk you through the how/why below: 

Here is my Emergency Kit - The whole thing fits in a Large Utility Tote from Thirty-one Gifts, mine is embroidered with the word "EMERGENCY" in big pink letters, so that anyone will know what it is (if god-forbid I was incapacitated, someone else would know exactly what this bag contains).
 The Kitty Litter & Shovel sit outside of the bag, and for good reason: if you are stuck in a ditch in the snow; you will need to be able to get to these items first!  The shovel helps you to dig out around the wheel wells quickly, and the kitty litter will be poured behind each tire for traction!  If you live anywhere where snow falls in the winter, I highly encourage you to place a $3 bag of this life-saver in your trunk! 

Now for the inside of the kit: 
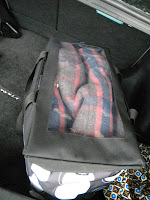

As you can see, a blanket and change of clothes are easily accessible.  This is for 2 reasons: again, winter - if you are cold and bordering hypothermia, you will not be able to handle an emergency well; second, if someone else is hurt in a car crash, a blanket will help keep them from going into shock! 


I have chains for my tires, jumper cables, a flashlight, a roadside emergency vest (in the paper towel tube), and emergency road-side flares in my kit, for those just-in-case car trouble moments. 

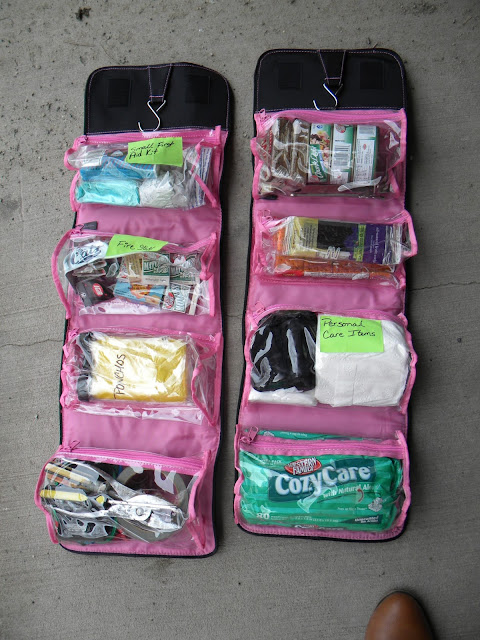
I also have 2 hang-up bathroom-organizer bags with clear pockets with all of my emergency supplies in them.  Because of the clear pockets, I am able to keep everything organized while still being able to see what is inside!  Shop similar here & here & here
Pocket contents starting from the top left: Small First Aid Kit; Fire Stuff; Ponchos; Tools, Duct Tape & Bungees
top right:  Food: tuna, high calorie backpacking bars & can opener; fruit leather & crackers; Personal Care items (tampons Toilet Paper); Baby Wipes
 NOT PICTURED - a large bottle of water inside a gallon ziplock bag  (DO NOT FORGET WATER!!)
These two roll up bags contain just about everything that you would need to survive for 24-48 hours in your car if the worst case scenario came true.   The food is all high calorie/high nutritional value food for the sake of a survival situation - two people could survive 2 days on this amount of food.   Water is really important in a survival situation, and I do not have enough water in this kit - I only have a 1.5 liter bottle, which would be barely enough to survive 1 day.   Another important thing to note, if you have canned tuna in your kit; please remember a can opener!

Now for packing the kit:

1. Put the heaviest items (and the ones that take up the most space) into your kit  first.
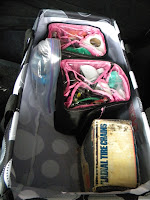
tire chains, water, & kits go in first!

2. Place everything else into the kit, paying careful attention to what you will need first in an emergency


3.  Finally, place the blanket on top of everything and leave it in the trunk of your car
                         (and hope you'll never need it) 


See Part I - Introduction
Part II - $20 Dollar Store Survival Kit Start
Everything In Place Please

Thursday, July 17, 2014

Thursday Tech Tip -- Snipping Tool

It's time for another Tech Tip Thursday!

Today I will share with you one of the most used tools in my tech toolkit the Snipping Tool!  I love this particular snipping tool because it is so user friendly and self-explanitory.

A view of the Snipping Tool

Because I use a PC, and use lots of Microsoft products, using this tool made perfect sense for me and my operating system.  This tool is automatically a part of Windows 7; in any of these capacities Home Premium, Professional, Enterprise & Ultimate.   Read More about it here

There are several snipping tools available on the internet, and most of them are free -   I use them to create pictures from photos I've already taken for my blog - see two examples below of photos I uploaded & modified, then used the snipping tool to save them as jpg photo files:

Another useful thing about the snipping tool, is you can use it when you are not hooked up to a printer to save important documents right from your computer screen.   The most recent use that I have found for this snipping tool was when I was not able to print a flight confirmation during a last-minute airport fiasco, but I was able to save the snip to my desktop for proof of purchase! 


Everything In Place Please

Sunday, July 13, 2014

$20 Survival Start Dollar Store - (Survival Series Part II)

For today's Deals & Steals post, I am going to begin the second post in my Survival Series.

As I've mentioned before, we are on a budget, and preparing for an emergency is going to have to be done $20 at a time.   I have committed to setting aside $20 in my monthly budget for stocking up on our emergency kit items.  For this first month, I decided to go to the dollar store and get some of the basic necessities: (20 items for $20)
Not bad for my first haul, huh?

 For the sake of storage, we will be keeping our supplies in these under-bed plastic storage boxes.  (these were left-over from our bedroom reorganization around the new year) For now, I have decided that one will have food supplies, and the other will contain everything non-food.  We have a separate small plastic bin for medicines and medical supplies.

As you can see, so far the food container only has noodle-meals (just add water, and they keep forever) and granola bars (I chose the ones with peanut butter since they had the highest calorie count which is important in a survival situation).


The supply bin has a few more items of interest:
  • knives
  • strong plastic silverware 
  • rope
  • lighters & matches 
  • plastic bags 
  • can openers
  • vegetable peelers 
  • Aluminum Foil
  • Duct Tape 
  • clothes pins 
  • notebooks (leftovers from college classes, just tore out the used pages and put the remainder in here)
I  will be storing them in the empty space behind our pantry in the entryway of our barn-style home.
They are behind the laundry hamper (you can just see the lid)

All of these items cost only $1, and are a wonderful addition to our emergency supply kit/survival kit.  I will update you all soon as we continue to make a plan for the worst-case-scenario. 

View part 1 (Introduction) here
Everything in Place Please

Saturday, July 5, 2014

Apocalypse Preparedness! (Survival Series Part I, Intro)

Alright, admittedly  there is no foreboding apocalypse around the corner, but my new favorite TV show (The Walking Dead) has gotten H & I thinking about the worst case scenario.   (Yes, we are late to this game ... Netflix is something we use & don't usually watch shows during the current season)
I love the photos I find on Microsoft's Copyright Free image search - don't you? 

We have the basic supplies necessary to survive a short time, but in a long term or worst-case scenario, we would be in a lot of trouble!

As most of you know, we are on a budget, so this Survival series isn't going to be an expensive tour through how to prepare yourselves.  This series will be a simple tour through what we are doing ($20 at a time!) to prepare ourselves for the worst case scenario.

I will walk you through:


  • The tools that we already have at our disposal: including basic camping/winter gear, and hunting basics.   
  • Several $20 trips to stock up on things that we hope we'll never need.  
  • Some of the bigger ticket (expensive) items that we will be purchasing slowly over time.  
  • Last, but not least, I will show you the best plans we have for both:
    •  "bugging in" (more likely since we are in rural Montana)  or 
    • "bugging out" (which may be more useful in an urban environment).


I look forward to sharing our successes with you over the next few months as we get ready for a worst-case scenario - ** I hope we never have to use these skills/supplies**

Everything In Place Please