Friday, October 24, 2014

Friday Favorites - Anniversary!

For this Friday Favorites post, I am going to gush about my man.  We just celebrated our 4 year anniversary and I couldn't be happier!  H is the ying to my yang and so much more... See some of our adventures in pictures below!

Vacation in Mexico over Spring Break
Before the Company Christmas Party!

Just on the couch - (please ignore the mess)


Before a Summer Wedding!

H is my rock, he is the glue that holds us together and I do not know where I would be without him.  He is my everything!

Thanks for letting me gush! 

Everything in Place Please

Saturday, July 19, 2014

Car Emergency Kit (Survival Series Part III)

In this Survival Series post, I will walk you through the items in my Car Emergency Kit.
My Emergency Kit in the trunk of my car!

I have always had an emergency kit in my car, thanks in large part to over-protective parents!  The basics that everyone needs to have in their emergency kit are:
  • small first aid kit 
  • food 
  • candle and/or flashlight (test the batteries)
  • jumper cables
  • basic hygiene items (tampons, baby wipes and/or toilet paper)
  • kitty litter 
  • shovel 
  • water
  • change of clothes
  • a blanket 
I know there are several more items in most emergency kits, but these are the basics.  I will walk you through the how/why below: 

Here is my Emergency Kit - The whole thing fits in a Large Utility Tote from Thirty-one Gifts, mine is embroidered with the word "EMERGENCY" in big pink letters, so that anyone will know what it is (if god-forbid I was incapacitated, someone else would know exactly what this bag contains).
 The Kitty Litter & Shovel sit outside of the bag, and for good reason: if you are stuck in a ditch in the snow; you will need to be able to get to these items first!  The shovel helps you to dig out around the wheel wells quickly, and the kitty litter will be poured behind each tire for traction!  If you live anywhere where snow falls in the winter, I highly encourage you to place a $3 bag of this life-saver in your trunk! 

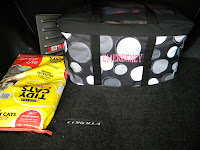
Now for the inside of the kit: 


As you can see, a blanket and change of clothes are easily accessible.  This is for 2 reasons: again, winter - if you are cold and bordering hypothermia, you will not be able to handle an emergency well; second, if someone else is hurt in a car crash, a blanket will help keep them from going into shock! 


I have chains for my tires, jumper cables, a flashlight, a roadside emergency vest (in the paper towel tube), and emergency road-side flares in my kit, for those just-in-case car trouble moments. 

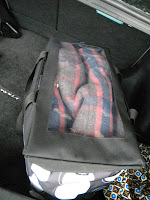
I also have 2 hang-up bathroom-organizer bags with clear pockets with all of my emergency supplies in them.  Because of the clear pockets, I am able to keep everything organized while still being able to see what is inside!  Shop similar here & here & here
Pocket contents starting from the top left: Small First Aid Kit; Fire Stuff; Ponchos; Tools, Duct Tape & Bungees
top right:  Food: tuna, high calorie backpacking bars & can opener; fruit leather & crackers; Personal Care items (tampons Toilet Paper); Baby Wipes
 NOT PICTURED - a large bottle of water inside a gallon ziplock bag  (DO NOT FORGET WATER!!)
These two roll up bags contain just about everything that you would need to survive for 24-48 hours in your car if the worst case scenario came true.   The food is all high calorie/high nutritional value food for the sake of a survival situation - two people could survive 2 days on this amount of food.   Water is really important in a survival situation, and I do not have enough water in this kit - I only have a 1.5 liter bottle, which would be barely enough to survive 1 day.   Another important thing to note, if you have canned tuna in your kit; please remember a can opener!

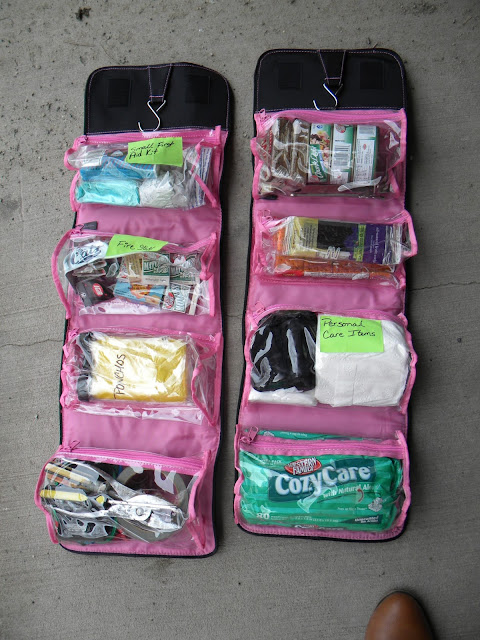
Now for packing the kit:

1. Put the heaviest items (and the ones that take up the most space) into your kit  first.
tire chains, water, & kits go in first!

2. Place everything else into the kit, paying careful attention to what you will need first in an emergency


3.  Finally, place the blanket on top of everything and leave it in the trunk of your car
                         (and hope you'll never need it) 


See Part I - Introduction
Part II - $20 Dollar Store Survival Kit Start
Everything In Place Please

Thursday, July 17, 2014

Thursday Tech Tip -- Snipping Tool

It's time for another Tech Tip Thursday!

Today I will share with you one of the most used tools in my tech toolkit the Snipping Tool!  I love this particular snipping tool because it is so user friendly and self-explanitory.

A view of the Snipping Tool

Because I use a PC, and use lots of Microsoft products, using this tool made perfect sense for me and my operating system.  This tool is automatically a part of Windows 7; in any of these capacities Home Premium, Professional, Enterprise & Ultimate.   Read More about it here

There are several snipping tools available on the internet, and most of them are free -   I use them to create pictures from photos I've already taken for my blog - see two examples below of photos I uploaded & modified, then used the snipping tool to save them as jpg photo files:

Another useful thing about the snipping tool, is you can use it when you are not hooked up to a printer to save important documents right from your computer screen.   The most recent use that I have found for this snipping tool was when I was not able to print a flight confirmation during a last-minute airport fiasco, but I was able to save the snip to my desktop for proof of purchase! 


Everything In Place Please

Sunday, July 13, 2014

$20 Survival Start Dollar Store - (Survival Series Part II)

For today's Deals & Steals post, I am going to begin the second post in my Survival Series.

As I've mentioned before, we are on a budget, and preparing for an emergency is going to have to be done $20 at a time.   I have committed to setting aside $20 in my monthly budget for stocking up on our emergency kit items.  For this first month, I decided to go to the dollar store and get some of the basic necessities: (20 items for $20)
Not bad for my first haul, huh?

 For the sake of storage, we will be keeping our supplies in these under-bed plastic storage boxes.  (these were left-over from our bedroom reorganization around the new year) For now, I have decided that one will have food supplies, and the other will contain everything non-food.  We have a separate small plastic bin for medicines and medical supplies.

As you can see, so far the food container only has noodle-meals (just add water, and they keep forever) and granola bars (I chose the ones with peanut butter since they had the highest calorie count which is important in a survival situation).


The supply bin has a few more items of interest:
  • knives
  • strong plastic silverware 
  • rope
  • lighters & matches 
  • plastic bags 
  • can openers
  • vegetable peelers 
  • Aluminum Foil
  • Duct Tape 
  • clothes pins 
  • notebooks (leftovers from college classes, just tore out the used pages and put the remainder in here)
I  will be storing them in the empty space behind our pantry in the entryway of our barn-style home.
They are behind the laundry hamper (you can just see the lid)

All of these items cost only $1, and are a wonderful addition to our emergency supply kit/survival kit.  I will update you all soon as we continue to make a plan for the worst-case-scenario. 

View part 1 (Introduction) here
Everything in Place Please

Saturday, July 5, 2014

Apocalypse Preparedness! (Survival Series Part I, Intro)

Alright, admittedly  there is no foreboding apocalypse around the corner, but my new favorite TV show (The Walking Dead) has gotten H & I thinking about the worst case scenario.   (Yes, we are late to this game ... Netflix is something we use & don't usually watch shows during the current season)
I love the photos I find on Microsoft's Copyright Free image search - don't you? 

We have the basic supplies necessary to survive a short time, but in a long term or worst-case scenario, we would be in a lot of trouble!

As most of you know, we are on a budget, so this Survival series isn't going to be an expensive tour through how to prepare yourselves.  This series will be a simple tour through what we are doing ($20 at a time!) to prepare ourselves for the worst case scenario.

I will walk you through:


  • The tools that we already have at our disposal: including basic camping/winter gear, and hunting basics.   
  • Several $20 trips to stock up on things that we hope we'll never need.  
  • Some of the bigger ticket (expensive) items that we will be purchasing slowly over time.  
  • Last, but not least, I will show you the best plans we have for both:
    •  "bugging in" (more likely since we are in rural Montana)  or 
    • "bugging out" (which may be more useful in an urban environment).


I look forward to sharing our successes with you over the next few months as we get ready for a worst-case scenario - ** I hope we never have to use these skills/supplies**

Everything In Place Please

Friday, June 6, 2014

Easy Creamy White Chicken Enchiladas


Fridays are usually my day to share some of my favorite things with you  - Here is a Friday Favorite Recipe -  (not like Friday needed another reason to be the best day of the week)

I found this recipe on Pinterest - and it is really fabulous! 

6-8 Tortillas (enchilada size)
3-4 cups Pre-cooked and shredded chicken (lightly salt & pepper the chicken)
1 cup sweet corn
4 cups shredded cheese (I like the Mexican blend)

Sauce:
3Tbs butter
3Tbs flour
1 1/4 c chicken broth
10 oz can cram of chicken soup
1 cup sour cream
1/2 tsp black pepper
1/2 tsp salt


    1. Pre-heat oven to 350 degrees
    1. Place chicken in the middle of tortilla
    1. Top with a light sprinkling of corn
    2. Top with cheese (about 1/3 cup)
    1. Roll-up and place in oven safe baking dish
    1. Repeat 1-4 with all tortillas
    1. Mix all sauce ingredients together in small bowl
    1. Cover the tortillas with Sauce
    1. Top sauce with the remainder of the cheese
    1. Cook for 25-30 minutes until heated through and cheese is melted

Easy Peasy!  This is actually really delicious - thank you again to pinterest! 

Everything In Place Please 


The original pinterest pin was credited to http://pin2fun6451.blogspot.com/  - an account that has since been disabled, if anyone knows where the credit for this fabulous photo and recipe should go - please comment below!   Thanks.

Thursday, June 5, 2014

Thursday Tech Tip - Easy Background Removal

For today's Thursday Tech Tip,  I am going to share with you one of the best tips I've found for background removal on an image.   You can use Photoshop for a more precise result,  but it takes at least 4x as long to get the image clean.

Microsoft Word has an amazing feature (starting with the version released in 2010) for the removal of backgrounds - check out their step-by-step tutorial here.

Instead of replicating their tutorial, I thought I would show you some of the images that I have changed using this simple tool.


One of my trombone students (although I had to take off the slide to make it fit on the poster)
Just to show how quick this tool really is, I am going to take a picture of my dog and remove the background for you - Here is the picture before:
And this is the picture halfway:
This is the screenshot with the in-process background removal

This is the final product: 

This only took me 5 minutes, and that included selecting a photo that wasn't blurry from Lucky moving too much!  

I'd love to see what you can do with this simple tool!  

Everything In Place Please

Friday, May 30, 2014

Breakfast Burritos

For this week's favorite recipe - I'm going to share with you what I did over the Memorial Day Holiday!   Having Monday off from work offered some time at home, and  I recreated my Breakfast Burritos!


 This allows me time in the morning, especially if I bring the burrito with me to work! These take some prep-time, but they are an easy go-to breakfast.   The original idea came from Pinterest (of course!) although I can't find the original pin right now.  I will link to it later if I come across it again!  This one is similar


I've made these burritos before using sausage, and bacon, this time decided to try using thick cut pepper bacon!  I like this version better, but it really is a personal preference.

I use smaller 8" tortillas that you can buy at the local supermarket or Wal-Mart for about $5 per 48 shells.  These shells are not whole wheat like the ones that we use for tacos in our home, but they work well for reheating as they are just a little thicker.  I have found that freezing tortillas works best with flour based ones, but feel free to do what works best for your family.


Since I had some spare time on Memorial Day that I did not have to work (thank you Holidays!), I cooked all of these in the morning while H was at the gym and I had the house to myself.   I personally prefer to cook all of the ingredients first and place them in mixing bowls on the counter before assembling them.   I tend to do 2 or 3 different "sets" as I go, so that I can cook the bacon and hash-browns a little slower.

my messy (in process) kitchen!
Here is what you will need for approximately 30 burritos:
  • tortilla shells 
  • 1 large package of hash-browns
  • a dozen eggs 
  • 2 lb package of bacon (I prefer thick-cut pepper)
  • *cheese*  (I forgot this step, so I've been adding it in as I microwave them)
Step 1:  Cook hash-browns, eggs, & bacon 

Step 2:  As you finish small batches of each type of breakfast food, place them in mixing bowls
(I used layers of paper towel to drain excess oil/water from the foods in between my small batches) 

Step 3:  Lay out Saran-wrap (plastic wrap) on the counter, then place a tortilla on top
 (don't do this until you are ready to wrap them, or the tortillas get dried out and don't close as nicely)

Step 4:  Add a small amount of each ingredient to the shells - (and DON'T forget the cheese like I did)

Step 5: Wrap & repeat

After everything was wrapped, I put the burritos into freezer bags and placed them in the freezer.  

When you are ready to eat them, I suggest taking them out of the plastic wrap and wrapping them in a paper towel, putting them in the microwave for approximately 1 minute on each side.  Since the ingredients are already completely cooked, you just have to heat them until warmed through.   Because I forgot to add in cheese (oops) I have to put the cheese in each time I microwave them... DARN! 

Everything in Place Please

Thursday, May 22, 2014

Time Management - Part III - Microsoft Outlook (Calendar)

*note* this post is not being compensated in any way - I just use this tool &LOVE it! 

For Part III of the Time Management Series,  I am going to give you a Thursday - Tech Tip involving a program that you might already have installed on your computer! 

Microsoft Outlook is a program that comes in the Microsoft Office Suite.   It is the calendar I use to manage my many work responsibilities and deadlines at my J.O.B. - Here, I'd like to show you some of the simple tools available within outlook to make your life easier! 

Overall, Outlook saves me a lot of time at work because it is my "digital brain".  The reminders that I can set on the calendar save a lot of headaches.  As many of you know, I have a very complicated concert schedule that I run as a part of my job.  This requires several deadlines for the same event: press releases, posters, programs, piano tunings, etc.   All of these can be digitally worked into my calendar; and when that deadline approaches Outlook pops up a reminder to do those things!  (The reminders are also in your task list if you don't want to wait for the reminder)

The archive feature also allows me to store several years of past e-mails (only the important ones, don't be a digital hoarder) - which saves countless hours of recreating things that have already been done!  


The reply buttons are right at the top of the homescreen - as is the shortcut menu - both of which are used constantly.    (I personally love clicking "To Manager" and having an e-mail pop up without wasting a key-stroke!)

Also, when a new e-mail comes into my in-box - I instantly sort it according to if it needs follow up.  Clicking the flag next to an email creates a "follow-up" in the system; and adds the e-mail to your task list.   If you right click when creating this flag, it also gives you the option to create a reminder with an alarm!   If it doesn't need follow up right away, then I will assign it a color as a "category marker"  - this allows me to look at my in-box with one sweep; and see what categories are waiting for me! 


  Everything In Place Please

Saturday, May 3, 2014

Time Management - Part II - Planning System Makeover

Before we get started with my totally awesome new planner - let me show you a little bit about the "old" system.   This planner from Organizher is really, really fabulous - totally customizable and durable.  I fell in love with this planner and have been using it for 2 or 3 years now.
Planner inside view
My "OLD" planner with categories

After knowing that this planner has worked for me for 3 years, and seeing how much I LOVED this planner, you are probably wondering why I have changed my tune ... well,  I started Graduate School!

I am really excited about my future and am thrilled that I will be able to complete my Master's degree from my home university while continuing to work full-time.  I really enjoy the online course format, but one thing that is missing when you "go to class" online is the consistent reminder of what assignments and readings are due on a given day.  For this reason, I decided to make my own planner for the 2013-2014 Academic Year.

I needed more space for each day than my previous system allowed for; so I elected to make the planner on 8.5 x 11" paper.   See a picture of the planner below:

The new layout - 8.5 x 11"
Here is an explanation of each page:
(I intentionally picked a week without much going on, so it wouldn't be messy!)


The binder I chose to use is the Wilson Jones Cut and Sewn Binder - find it here.  I really like the durability and feel of this binder, plus it has an elastic strap that can hold it closed --  (and it has 3 rings!)


Let me know what you think about the new planner system!   I can't wait to share how it is working for me! 

Everything in Place Please!


Saturday, April 26, 2014

Time Management - Part I - Cozi

Scheduling & the way I run my calendar 

*note* this post is not being compensated in any way - I just use this tool & LOVE it! 

Today we will start a NEW series on Time Management!!  I'm so excited to share with you how my crazy/busy/hectic life is actually not driving me completely crazy! 

So ... for those of you out there that are extremely busy (like the rest of us)  - here is the first tool I am going to share with you  - Cozi

Cozi is an online service that syncs a digital schedule with your grocery list, a to-do list, meal planning, a message service, and a journal feature.

The best part is that more than one family member can download the app on their phone (available for both iphone and android) and then you can share (and update) your grocery list!!  You share the same password and each family member can log in with their own e-mail address!

Here is what the shopping list portion looks like from my phone:

If you would like to take advantage of more features, there is a "gold" upgrade that gives the ability to use the birthdays tool, shopping list mode and some other neat features.  This costs $24.99 per year. 

Personally, I use this birthday's tool in order to remember all of those important days for both H & I's families AND to remember customer birthdays for my business...  this feature is the reason I decided to subscribe to the gold service - pictured below:

Give Cozi a shot and let me know what you think - Also ask any questions you'd like about how I use this app/web-service to run my calendar!

Everything in Place Please

Wednesday, April 23, 2014

Brain Book 4/23/14

An early morning Brain Book this time!

Here is what I've been  filling my brain with! - Each of these is so good I could spend hours on them; so I won't post too many!!


       Leave me your ideas for things I should fill my BrainBook with!  I look forward to hearing your suggestions; and helping to move all of us forward into a more organized life! 


Everything In Place Please 


Saturday, April 19, 2014

$5 Savings Plan

As you know,  I am working on a Master's degree in Family Financial Planning - so many of my posts will be related to finances.   I even have a pinterest board called Money Matters.

Today - our topic is the $5 Savings Plan


 I know this is going to sound crazy to a lot of you; but it WORKS!    Saving for something $5 at a time is really easy if you follow this system!

In the spirit of trying to save for my (two) vacations at the end of July,  I need to have a plan in place for my personal spending money on the trip...a good friend gave me the idea for what I am now calling my $5 savings plan.


Here are the rules:
  1. Carry Cash
  2. Every Time you get a $5 bill as change - it goes straight to savings! 
That's it!  Those are the rules!   Simple!  (and effective!)


I have already put away nearly $100 in savings for my trip this Summer,  and I've only had this system in place for 6 weeks! 

What can you save for $5 at a time?   

Everything In Place Please

Wednesday, April 16, 2014

Brain Book - 4/16/14


Here is what I've been looking at and filling my brain with for the past few days!

Today's BrainBook:


  •   Take customization to the next level // InkGarden.com 
    • I really like this site for creating custom postcards, mugs, whatever really - there is no charge for uploading custom photos, which is great & everything is highly customizable!  Yay!


       Leave me your ideas for things I should fill my BrainBook with!  I look forward to hearing your suggestions; and helping to move all of us forward into a more organized life! 


Everything In Place Please 

Saturday, April 12, 2014

Top 10 - Organizing!

Yes, I know; an organizing blog with a top 10 list of organizing essentials, but this list is full of things I absolutely could not be organized without.  In fact, I'd dare to say that this blog would not exist without these top 10 items!

READY, SET, TOP 10!

#1 Password Book 

  • This is my brain saver super hero!  The one that I use I got from Amazon, and I absolutely love it!  This is one thing I could not live without (it even has it's own pocket in my purse).  
  • I have a lot of passwords between my work and home websites; and I try to keep them all different, so the password book is extremely helpful
  • *tip* this particular book has a line for password "hint" - use it instead of writing out your passwords, as a written record of all of your passwords could be disastrous if you ever lost it. 

Click Here to link to Amazon for the password organizer I use! (photo also from Amazon)
#2 sticky notes 
  • I have sticky note fever!  I use both paper versions of these stickies, but also a desktop version for my work and home computers!
The 4 main colors I use 


#3 Binders (the 3 ring variety) 
  • If you are anything like me, you probably have a few of these little gems running around unused in your house.  Don't fret!  These things are a gold mine of ways to organize yourself!
  • Some things I use mine for
    • Recipe Binders 
    • Business Organization 
    • Supply Keepers
    • Home Organization Binder 
    • Finance Binders 
    • Blog Idea Log 
    • and more ... (I promise a not so distant future post that will explain some of my systems for using binders in detail!)
Photo credit: Microsoft Office Image Search


#4 Mesh Cubes

  • These build-able blocks are so flexible!  I personally use them in the bottom portion of my closet to separate clothes and to corral socks that don't fit in our limited drawer space.  These are on my organizing top 10 simply because they are invaluable for those in small space living situations!
  • I think that I originally bought mine in college as an easy dorm living solution, but they are still proving valuable for me every single day (and I've been out of college for 4+ years!)


Build-able mesh cubes - I found mine at Target (picture also Target)
#5 Launching Station 

  • This is an idea that I borrowed from Simplify Your Time by Marcia Ramsland
  • Basically, it is where everything that I need for the next day is set out so it is ready for a quick get away when I'm ready to leave the house.   
My Launching Station

#6 Letter Trays 

  • I have several different sets of letter trays that I use both at work and in my home office. 
Amazon.com (photo also Amazon) 

#7 Magnetic List Notes 

  • 2 things that make these an invaluable organizing tool
    • The Magnet 
      • They attach to any magnetic surface including the fridge and file cabinets - this way there is always a piece of paper handy when you need one (an it eliminates the paper clutter of notepads everywhere without a home) 
    • The Price 
      • I buy them at the dollar store once a year. When I run out I spend $10 and am set for the year! 
      • There is really no need to buy expensive versions of these - they are so easy to find in the reduced bins at large chain stores, craft stores, and discount stores. 
My office file cabinet notes


# 8 Bookshelves 

  • Shelving of any kind is absolutely essential for small space living!  
  • Below you will see some pictures of my home office bookshelves, but rest assured shelving will come up again in later posts.


#9 Bins 

  • Fabric Bins with handles help to organize all sorts of different portions of my house; including the fridge, pantry, bookshelves and office furniture!
Picture from Amazon.com


#10 Mail Center 


  • Our Mail center is where all the mail comes in and gets sorted before ending up in its ultimate destination (usually the file cabinet)
    • Our mail center also has stamps, paper clips, phone books, a calendar, some envelopes, pens, scissors, and a file folder system that works for us ...
      • Make yours work for you and your family - feel free to use mine as an example of a place to start, and add hanging files or folders as deemed appropriate for your family!
  • One of the most important steps to a functional mail center is ensuring that each person empties their portions of the file system on a regular basis.  (If this doesn't happen, the mail center becomes a clutter center - yuck!) 

Everything In Place Please